

I've gotten a lot of questions about my invitations for my son's 4th birthday Knights and Dragons party so I decided to do a tutorial. If you know some basic digital scrapbooking skills or have experience with a photo editing program such as Photoshop it's a very easy and affordable way to create custom invitations and cards.
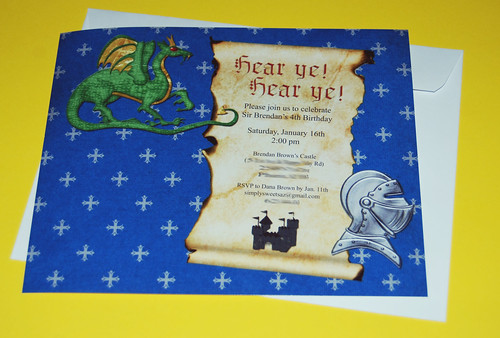
STEP 1: First you need to find a digital scrapbook kit to fit your party theme. My favorite shop is Sweet Shoppe Designs (the owner of this great site lives in Arizona). If they don't have what I want, than I just do a Google search such as "knight digital scrapbook kit". For the Knights and Dragons party I used "A Knights Tale" from ScrapMatters. The kits are also useful for creating party decorations and you can use it again to scrapbook your event.
STEP 2: Determine the size file you need for your invitation. Sometimes I use a 4 x 6 and print the invitation as a photo. You need to also purchase envelopes that are 4 x 6 - the ones I purchased were a little small so I end up having to trim a little bit off to get the invitations to fit in the envelopes. This year I used Costco's photo cards blank template for the 6 x 7 1/2 Photo Greeting Cards. $14.50 for a set of 50 cards and that includes envelopes! I didn't need 50 but saved a few for scrapbooking later and one to display at the party.
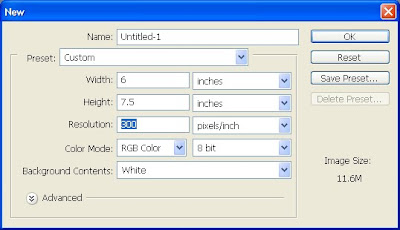
STEP 3: Open your favorite digital scrapbook program. Create a new file in the correct size for your invitation. Make sure when you are selecting your file size you are using inches instead of pixels. Set your resolution to 300 pixels/inch.
STEP 4: Design your invitation. Start with a background paper. Because the cards are smaller than a typical scrapbook page I like to reduce the size of the paper so the pattern is proportional to the invitation. Add some text, embellishments and even photos of the guest of honor.
STEP 5: Save the file as a .jpg
STEP 6: Follow the directions for the photo printing website you have selected (or print from home if you have a photo printer).
To use Costco's photo center: Upload your file to the Costco photo website. Create a greeting card project. Select "More Holiday", scroll to the bottom, and click on "Custom Template". Select horizontal or vertical. Select the correct photo from your album. Place your order and pick up your order in a few hours from your local Costco. Helpful hint: they even sell stamps at the photo center so don't forget to pick some up.
STEP 7: Put your invitations in the mail
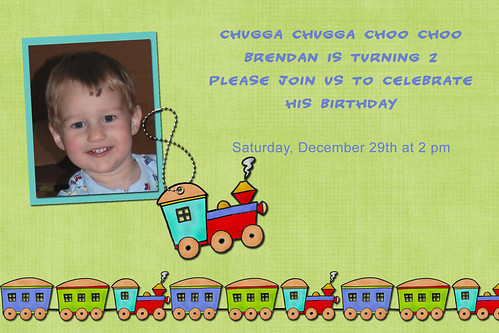
Here are a few more examples of invitations I created for birthday parties (these were printed as 4 x 6 photos):

1 comment:
Post a Comment